This was a bit of a struggle from the beginning and eventually we will learn enough about wiring it all together. But this is one of those projects that didn't quite go as expected.
Here's how it all went down.
We contacted a guy who knew a guy that could install interior rope lights. That's how we have found after duty work projects guys in the past. Someone knows someone. In Red Bay it is very common.
Our guy is a pretty busy and hard working fellow. He finished up another job and came over and we finally got started on the install about 7:25 PM Thursday night.
He used the air system from the Roadrunner for his brad gun.

Then he carefully pried off the bottom molding piece of the DS slideout, beginning in the rear. That exposed the metal screws holding the larger molding which was secured into the metal slideout frame.

Next we removed the middle and front pieces, then laid them face side down on the floor. We then carefully measured the rope lights to precisely the length we wanted. There are faint scissor marks on the rope light to show you were to cut.

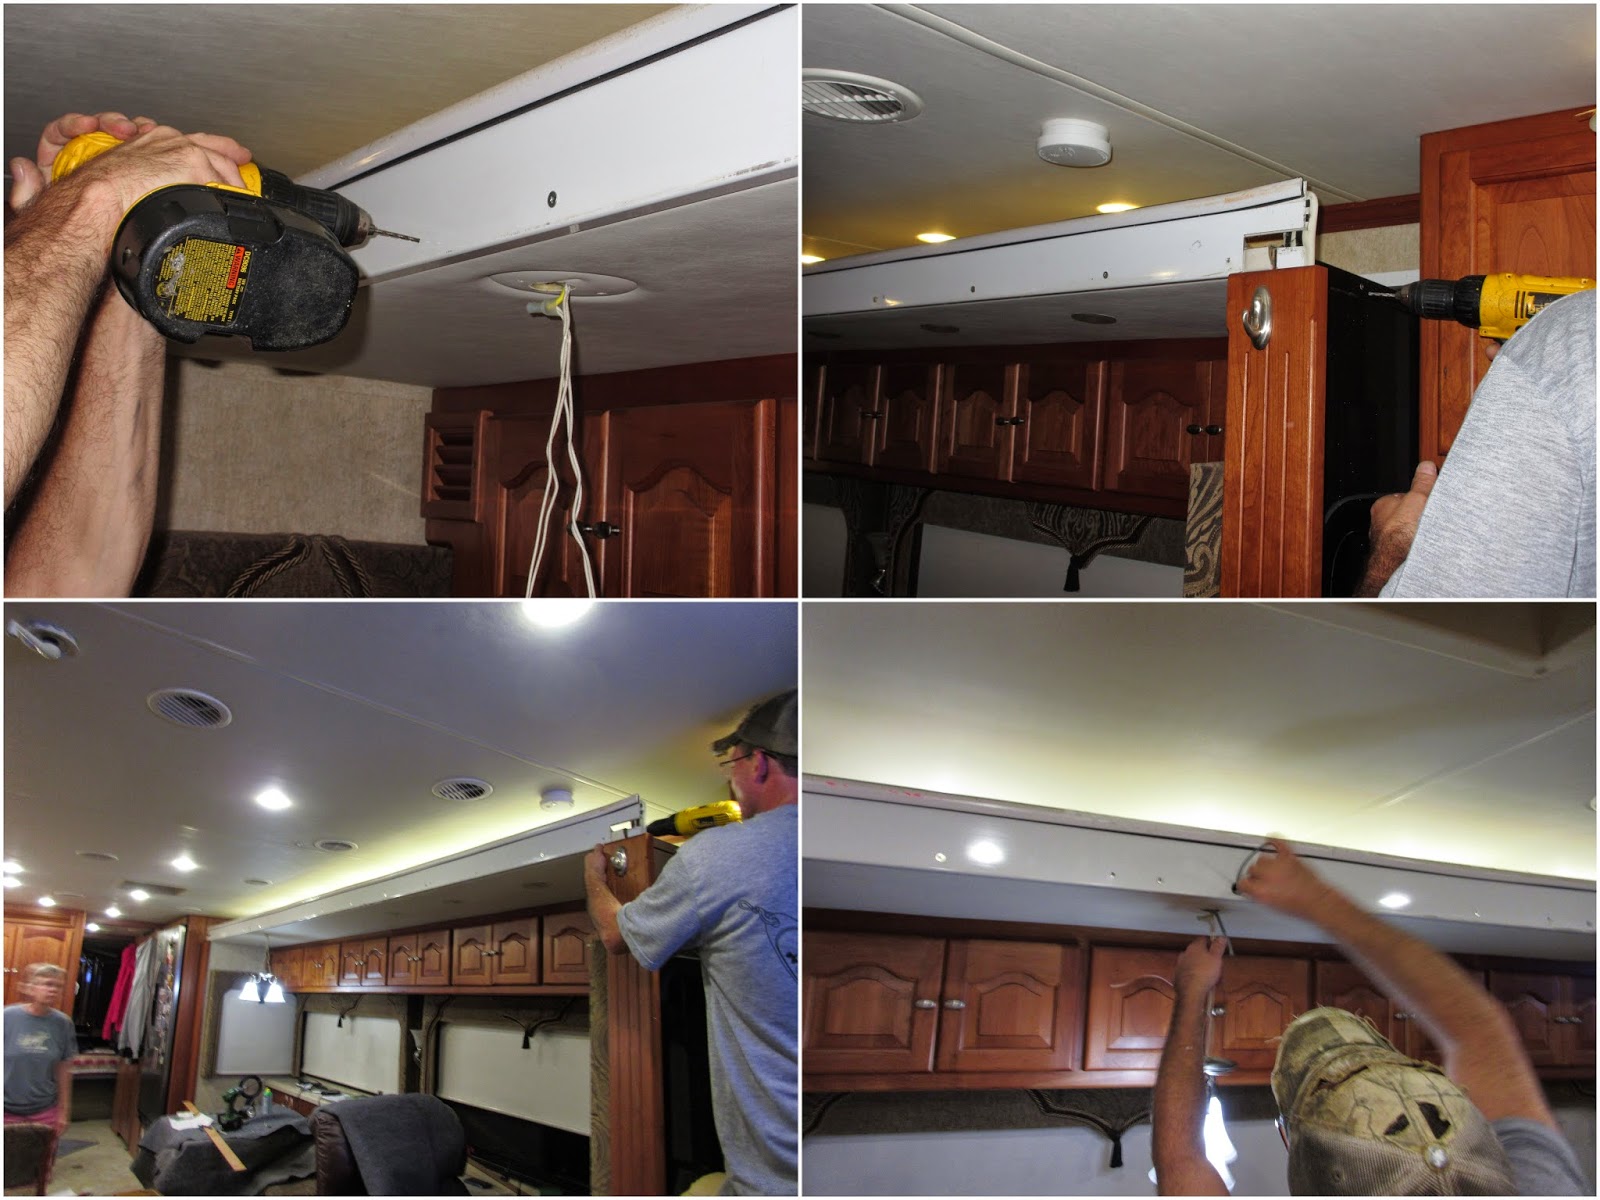
The speaker wire then was fed through the front end of the metal hollow tubing/frame down to the light over the table. After shoving it down through the channel, we fished it through the extra hole we drilled, then down through with the other wires to the existing light.
So far so good. But this is the hardest part of the whole projects. We have two lights and two switches on the wall. We are going to add a third light and switch (rope lights) and have them all work together. All on, all off, some on some off and every combination.


I wish I had watched more closely on what he hooked up to what. We checked it out and it all worked fine. Three lights, three switches and every combination of on/off.

We are scratching our heads though after taking the light down over the table and looking at all the connections. We took off each connector and rewire them all but clearly didn't get it right. More to follow on this...
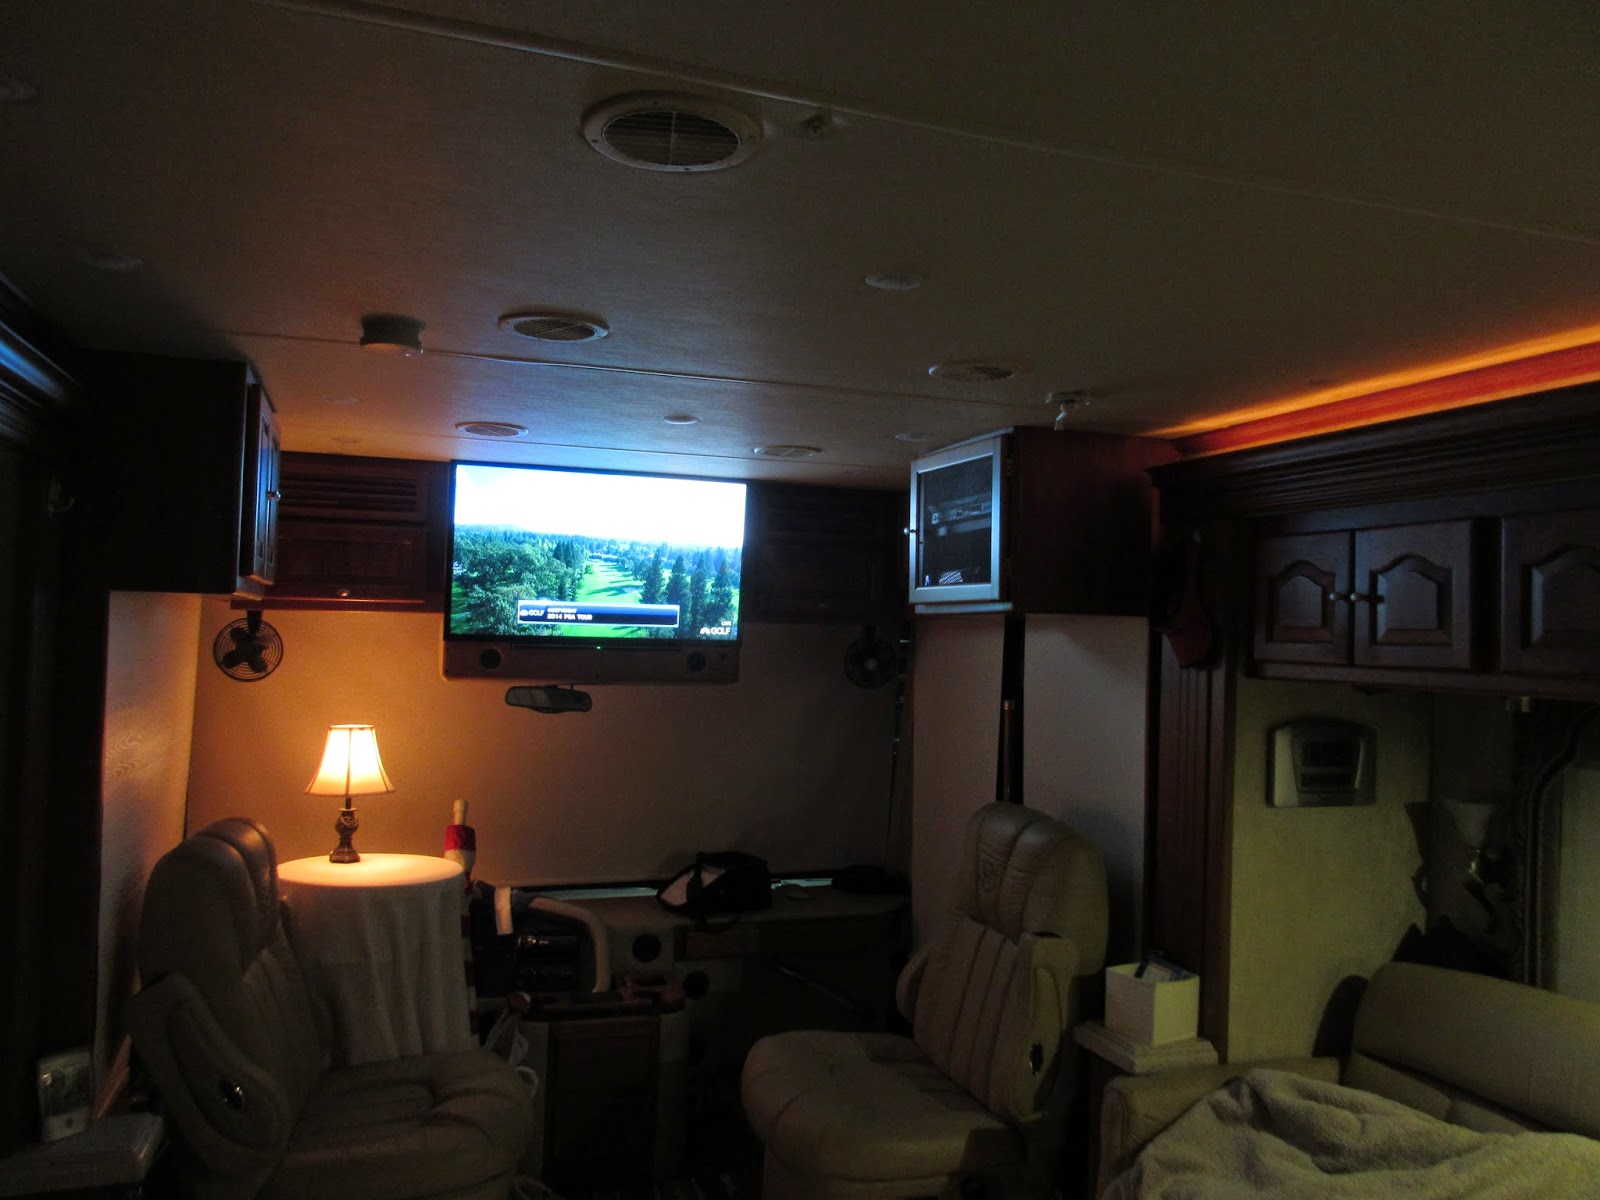
I share this in part to document the fact that not all our upgrades go smoothly. Most do, this one did for one set of lights. Then too, I believe we will eventually figure it out and be able to show you the new lights on both sides.
That's all for now and THANKS for joining us on the Roadrunner Chronicles!
Knowing you two, you will get it figured out. Is is possible that, that one set of running lights are defective?
ReplyDeletewww.travelwithkevinandruth.com
We checked and rechecked. All the lights work. We did another check on the side that isn't working when we took the wiring apart and rewired it all back together. But there is one wire that goes somewhere...? Which is probably our problem. But we tried all the combinations we could think of. We will try again another day.
DeleteYep - you'll figure it out. And yes, sometimes not all mods work correctly the first time. I had to change the configuration of our storage cabinet we placed in the dining area. The stock kitchen cabinet purchased from Lowes did not have the doors in the best position for our needs. So I had to change the door mounting. Then the rear drawer supports failed so one more fix to our cabinet. Finally got it done.
ReplyDeleteEven people that do modifications for a living don't always get it right the first time. The effect is really Awesome looking forward to seeing it Perfected.
ReplyDeleteBe Safe and Enjoy!
It's about time.
So far I LOVE the lighting...Knowing you two, you will get it all done!
ReplyDeleteNice mood lights and they use very little power, bet you will enjoy them a lot.
ReplyDeleteUgh! Hope you find the little gremlin that's screwing with your lights quickly. At least it's not something that requires a tow truck to get fixed! ;c)
ReplyDeleteI really impressed by your above blogging tips. Thanks for tip!
ReplyDeleteLighting Management Company